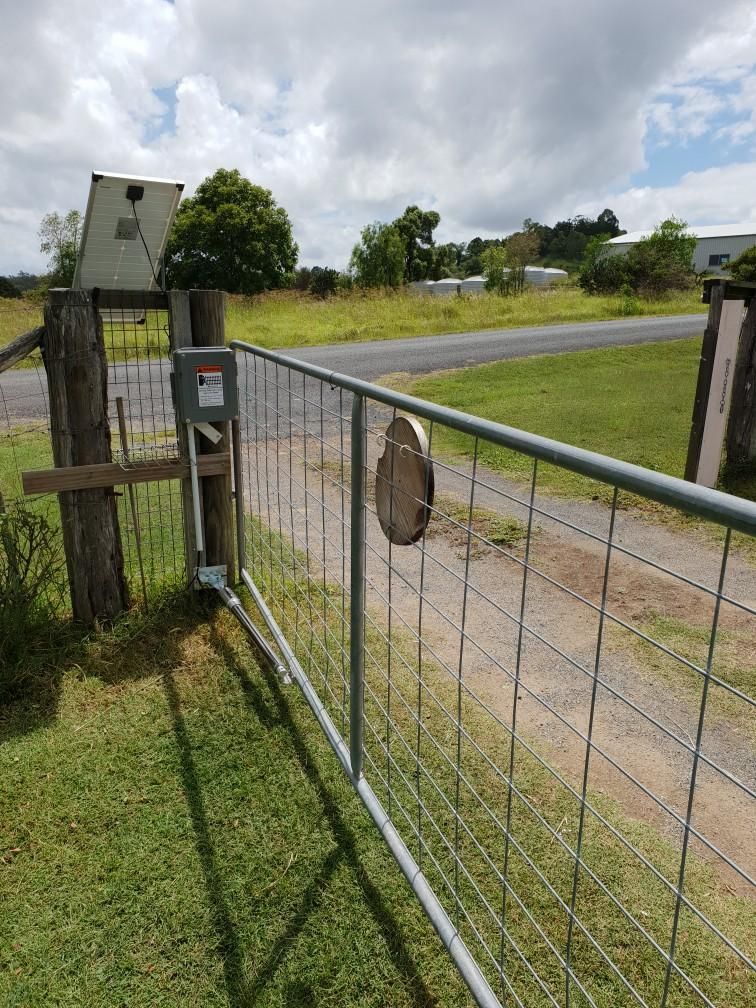
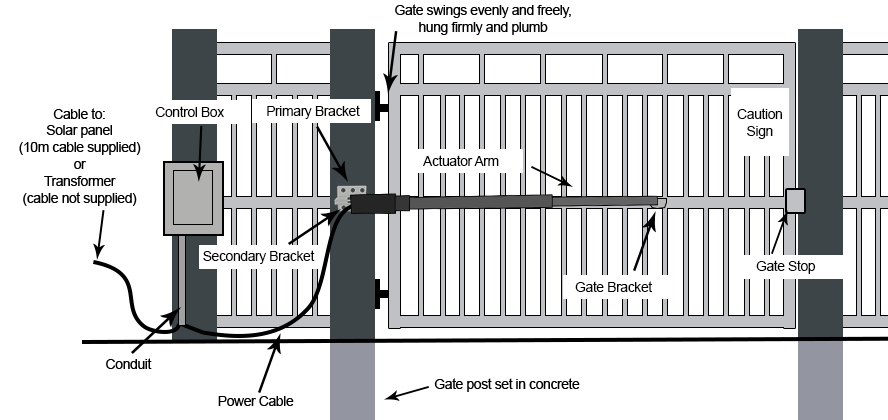
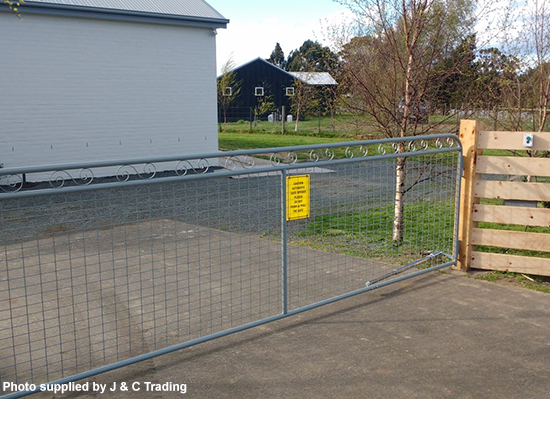
Single Swing Setup
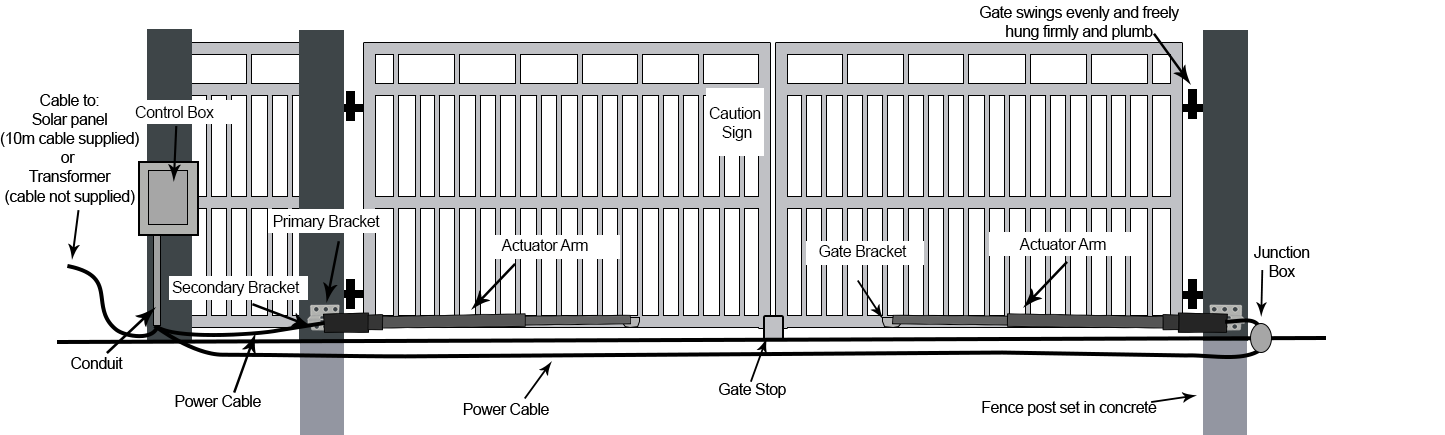
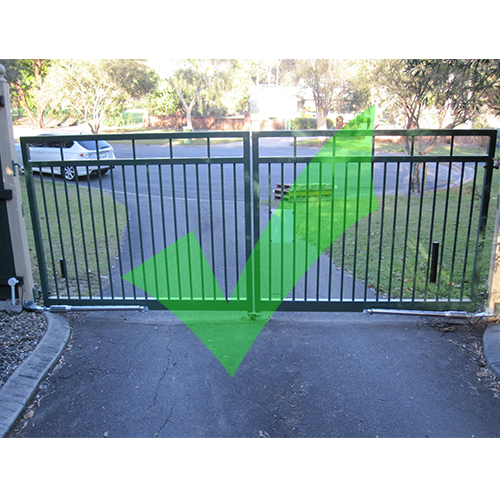
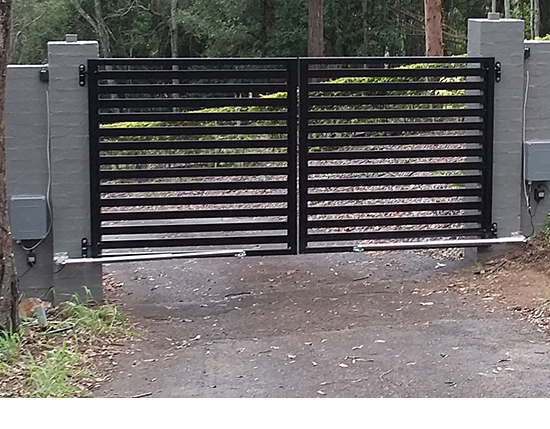
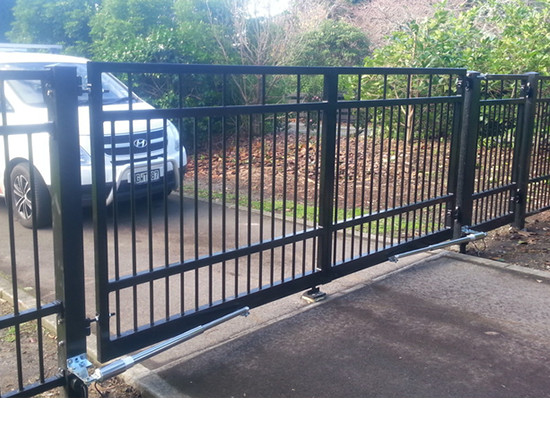
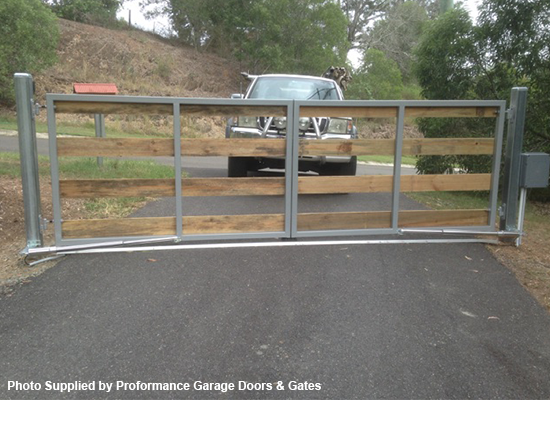
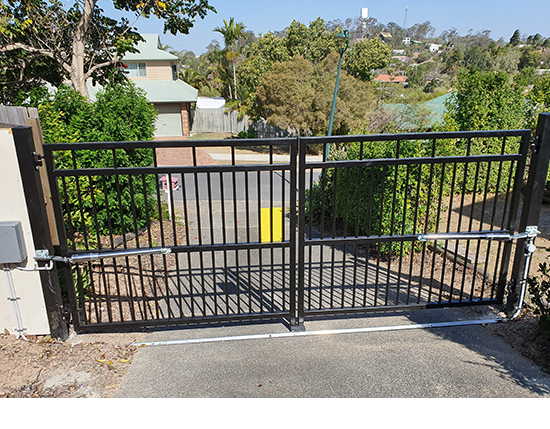
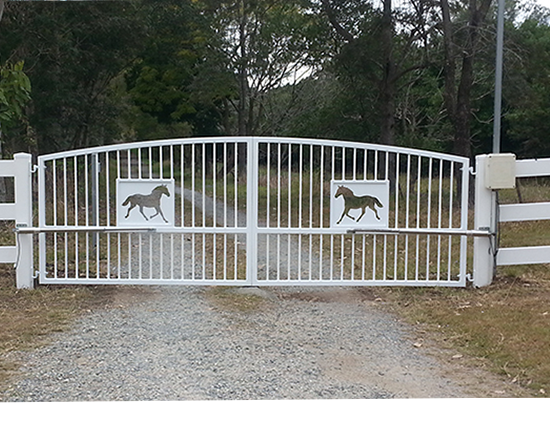
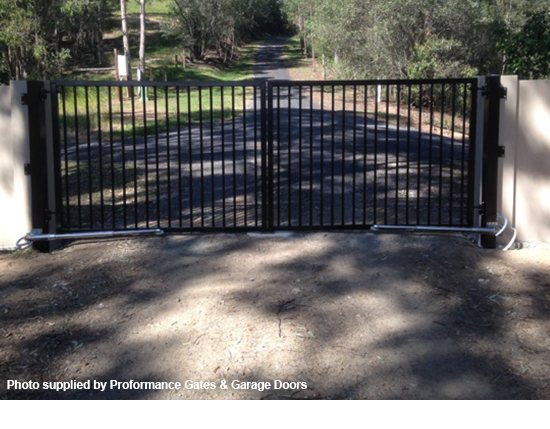
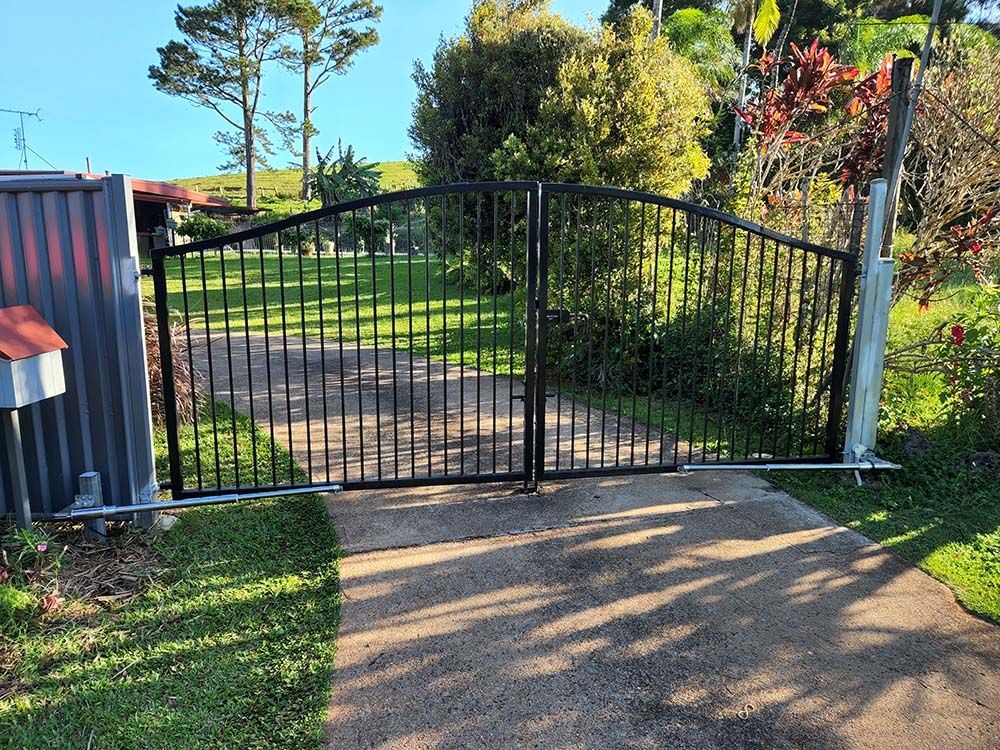
Double Swing Setup
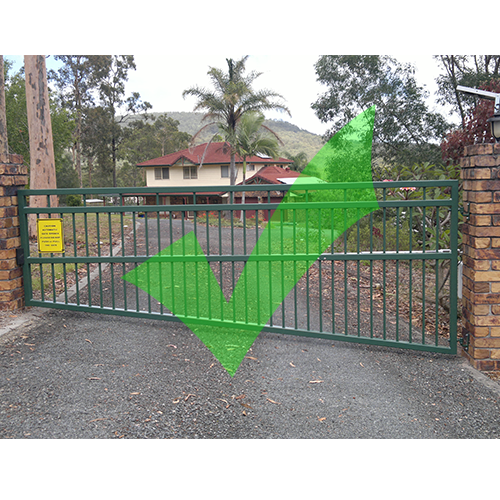
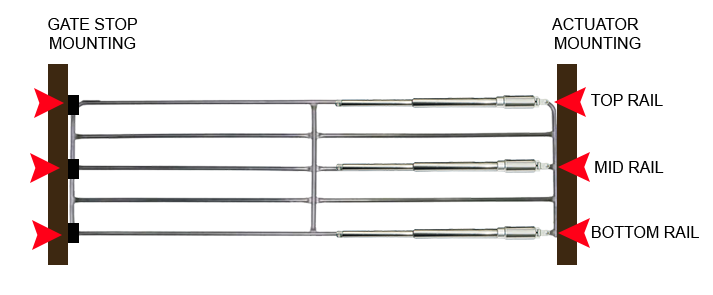
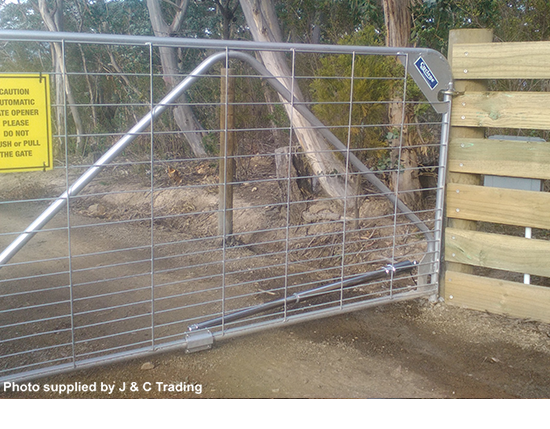
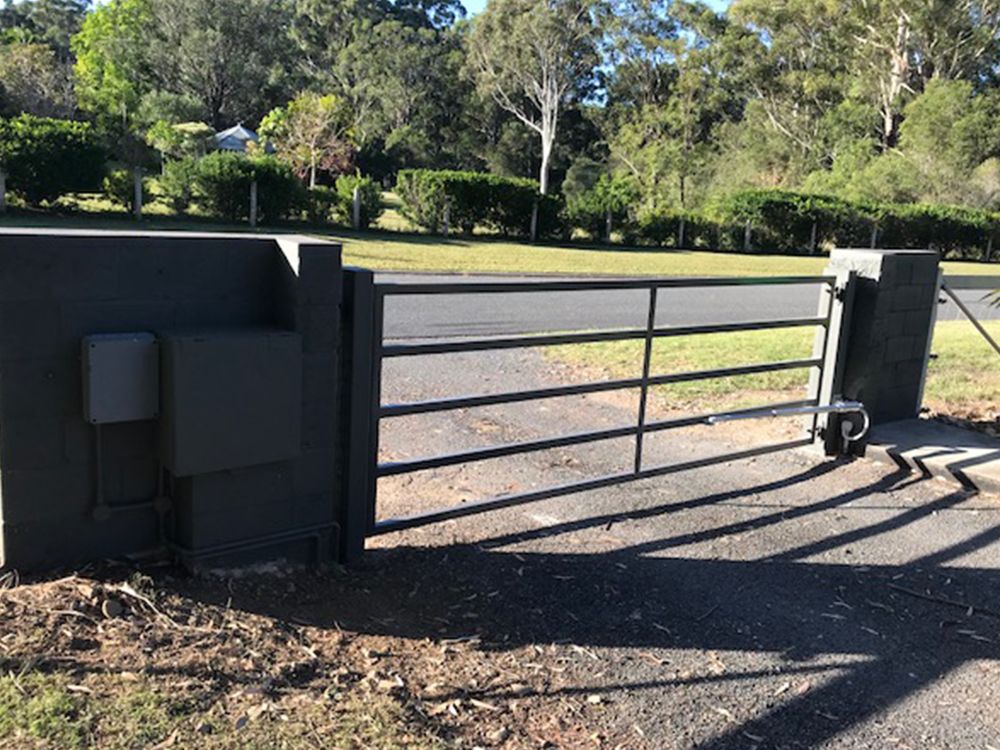
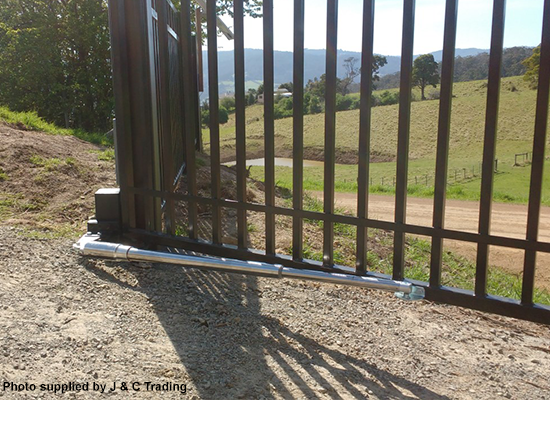
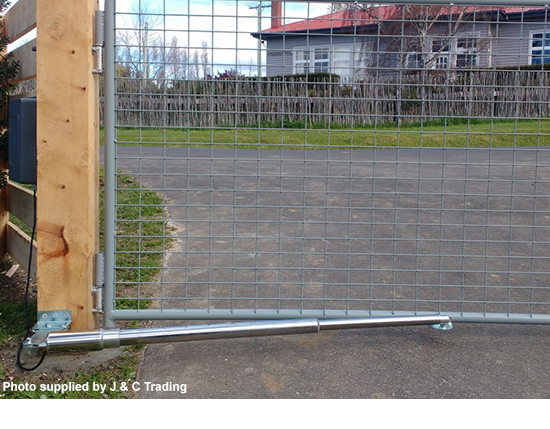
Actuator arm placement on single gate setups
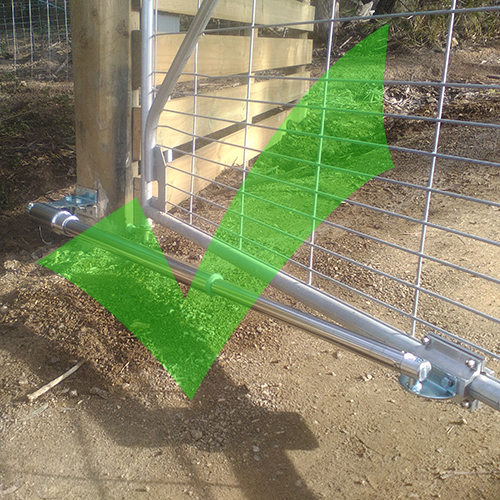
The actuator arm and gate stop (if using from the kit) must be mounted on the same level to prevent any bending or twisting of the gate.
If your gate is opening onto an object eg. retaining wall, fencing, garden bed, there must be a minimum clearance of 200mm between the gate and the object when in the open position. This will allow good clearance for the actuator.
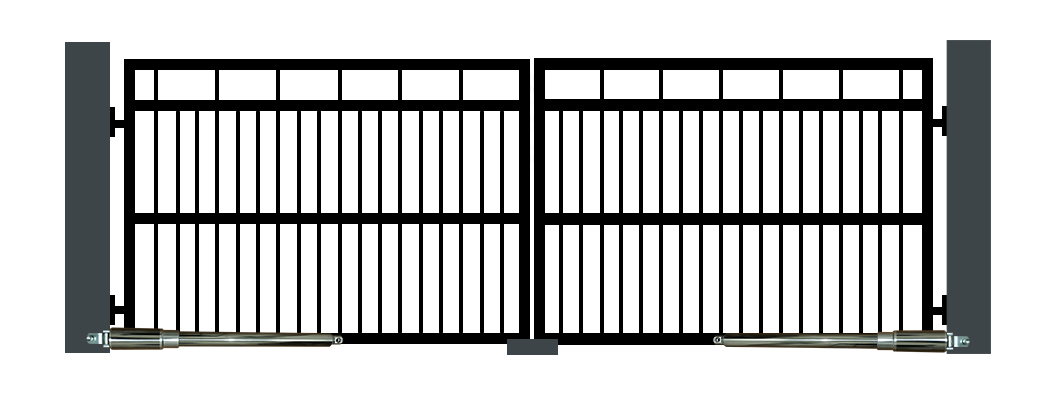
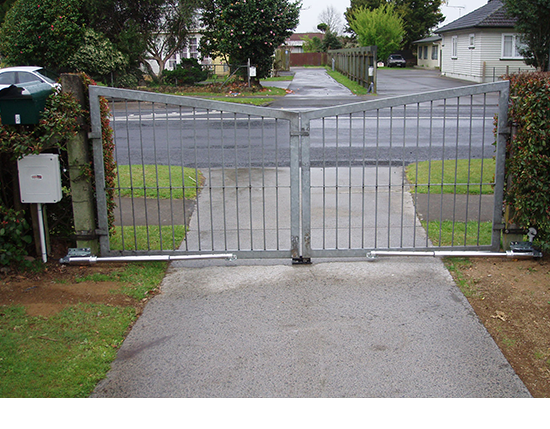
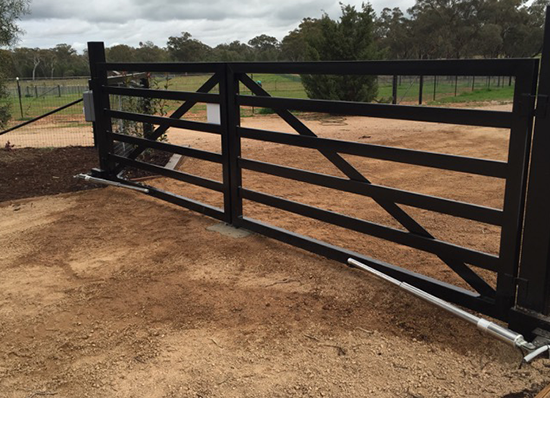
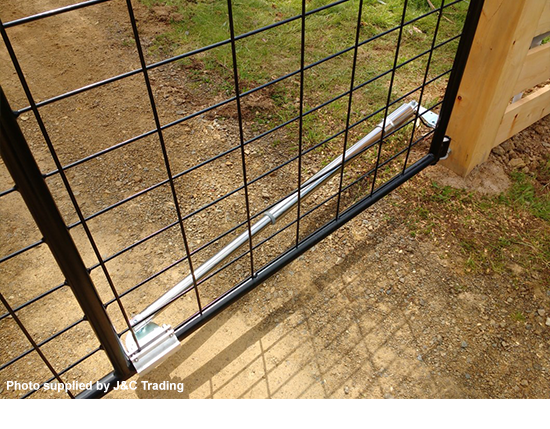
Actuator arm placement on double gate setups
Double actuators should be mounted to the bottom of your gate frame to apply pressure on the stop in the middle of the driveway (as shown in picture below)
If your gates are opening onto an object eg. retaining wall, fencing, garden bed, there must be a minimum clearance of 200mm between the gates and the object when in the open position. This will allow good clearance for the actuators.
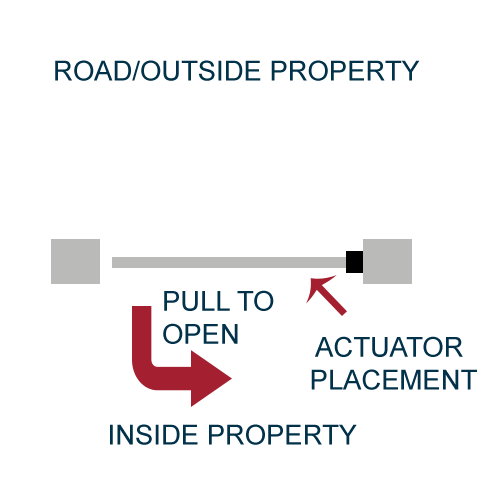
Pull to open setup A
Actuator arm mounted on the inside of the property pulling the gate into the property to open.
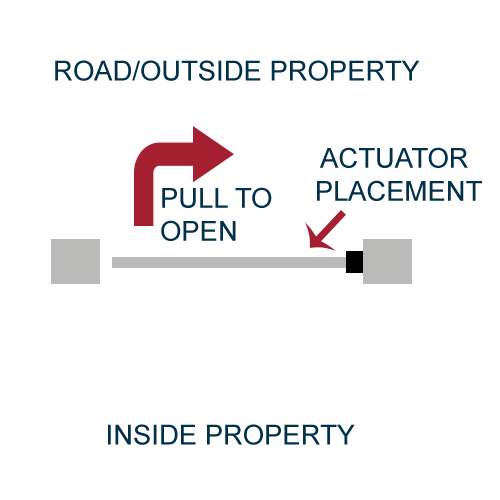
Pull to open setup B
Actuator arm mounted on the outside of the property pulling the gate outwards to open.

Push to open setup A
Actuator arm mounted on the inside of the property pushing the gate out towards the road to open. This setup may require the 'push to open bracket'.
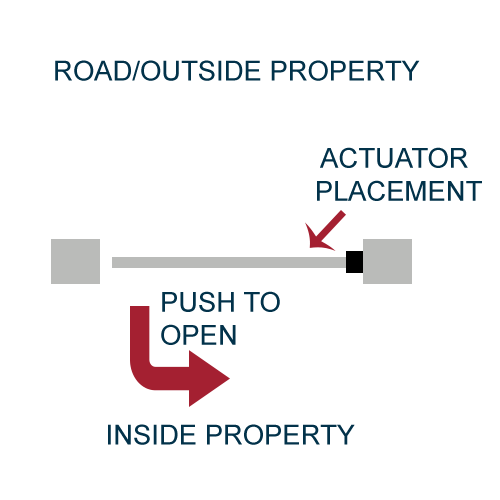
Push to open setup B
Actuator arm mounted on the outside of the property pushing the gate inwards to open. This setup may require the 'push to open bracket'.


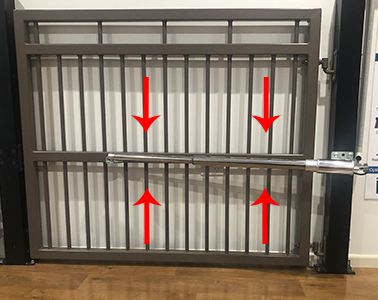
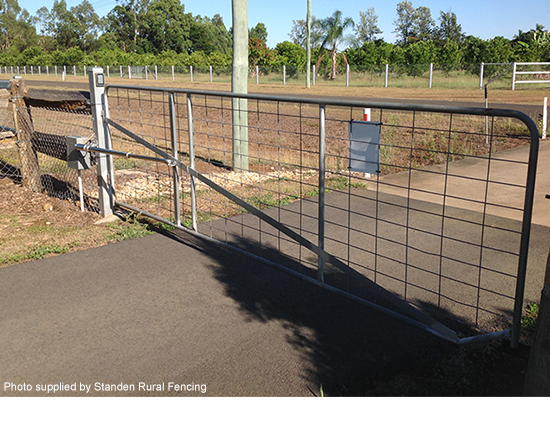
Arrows are showing that the actuator arm must be level with gate at all times
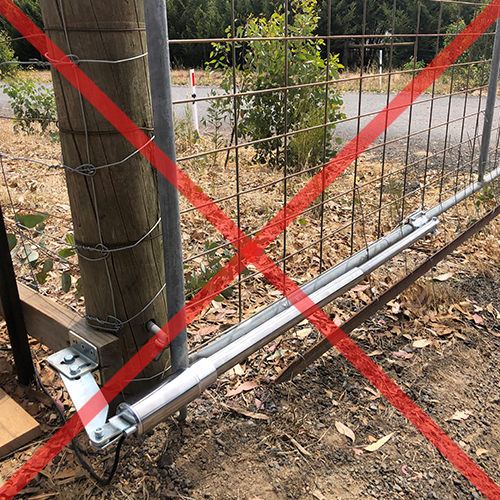
Gate in the closed position - actuator arm must never run parallel with the gate. There must always be an angle between the gate and arm at all times (as shown in image above).
Gate in the open position - actuator arm must never run parallel with the gate. There must always be an angle between the gate and arm at all times (as shown in image above).
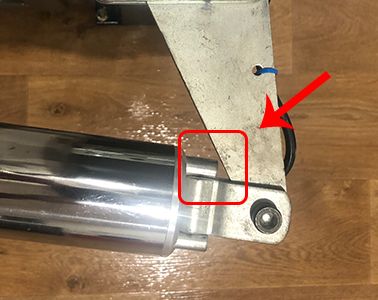
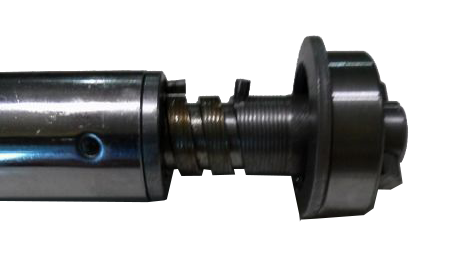
Ensure when the actuator is setup that the back pin on the motor cap is not binding back on the secondary bracket. There must be a small gap between these 2 points otherwise you run the risk of damaging the motor.
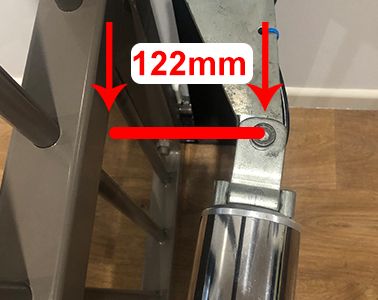
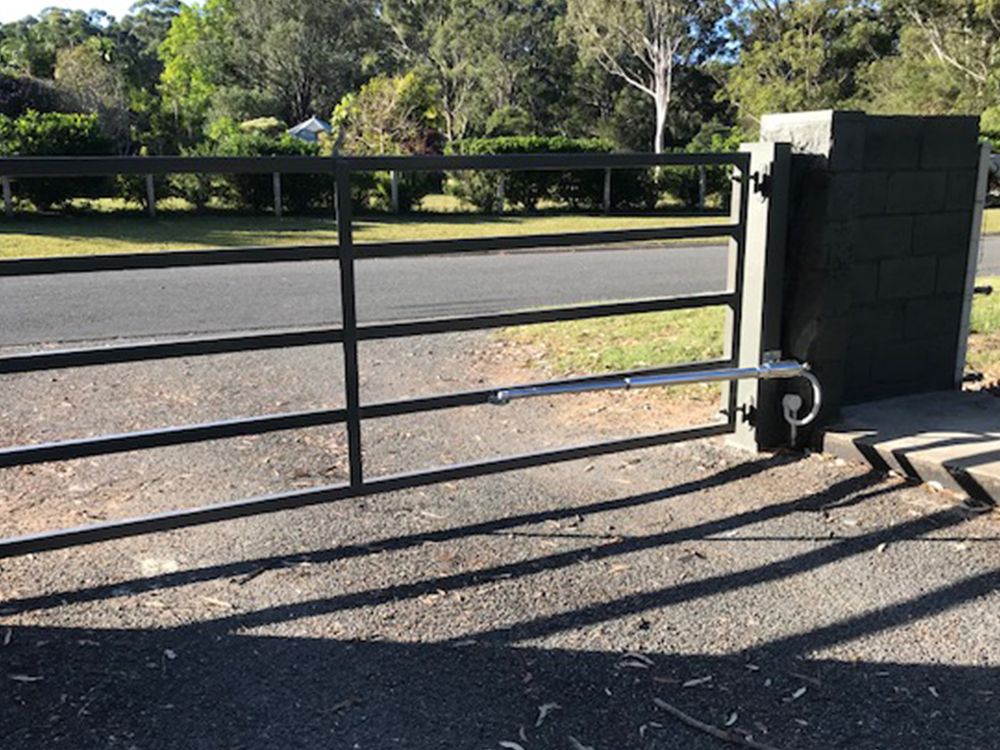
When using the round gate bracket
The actuator arm's pivot point measurement when initially setting up is very important. If you are using the round gate bracket then you should have a measurement between the gate and povit point of 122mm when the gate is in it's open position.

When using the standard gate bracket
The actuator arm's pivot point measurement when initially setting up is very important. If you are using the standard gate bracket then you should have a measurement between the gate and povit point of 110mm when the gate is in it's open position.
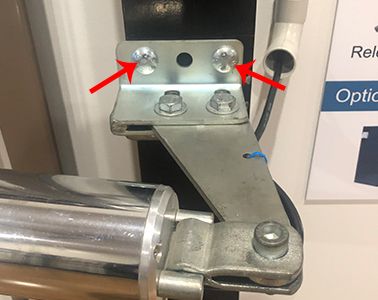
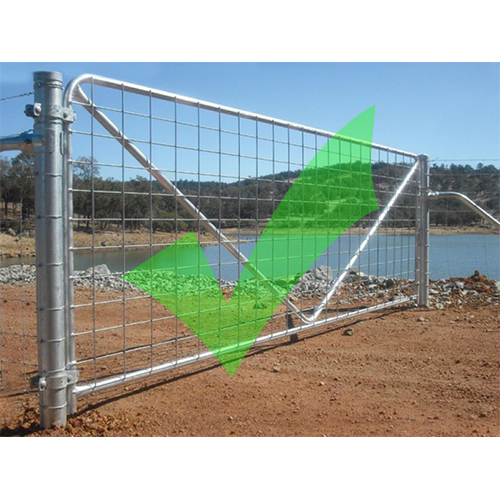
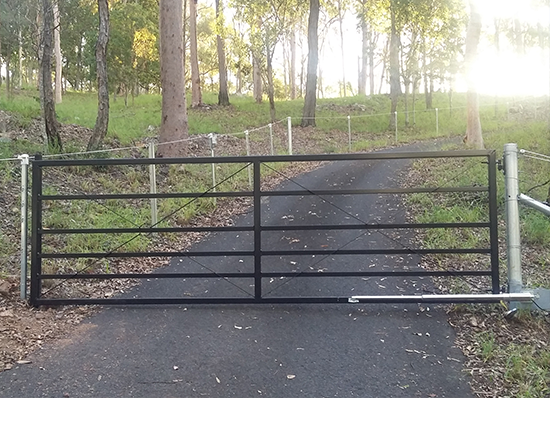
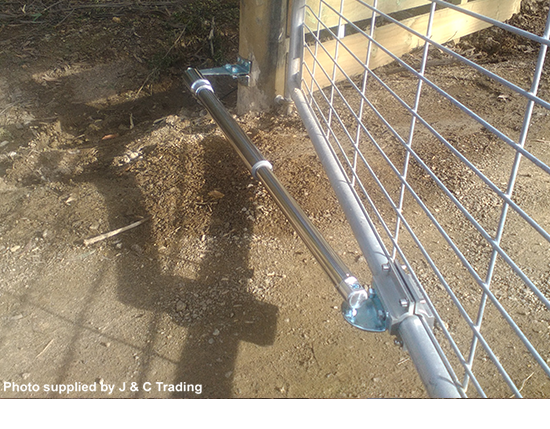
Arrows are showing that it's best to have your bolts for the post bracket go straight through your post for a good strong hold (please note: bolts are not supplied)
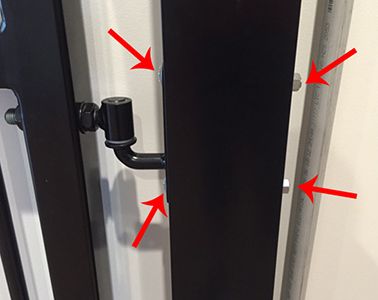
Your gate should have good strong hinges. Having bolts go straight through your post will provide you with a good strong hold as shown in the above photo.

You can position the actuator arm for a single gate on either the bottom, middle or top of the gate frame, however double gates should be mounted to the bottom of the gate frame.
Push to open setup
Gate in the open position
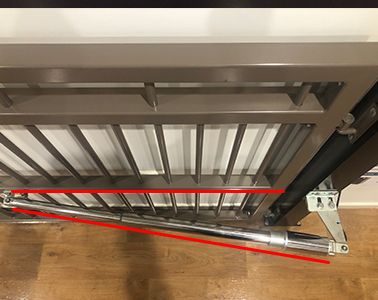
Arm shown running too parallel with the gate
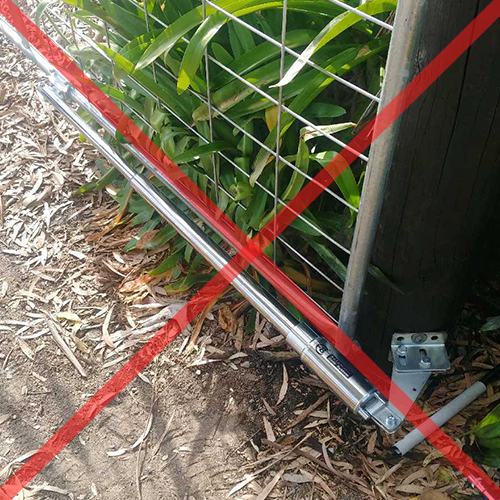
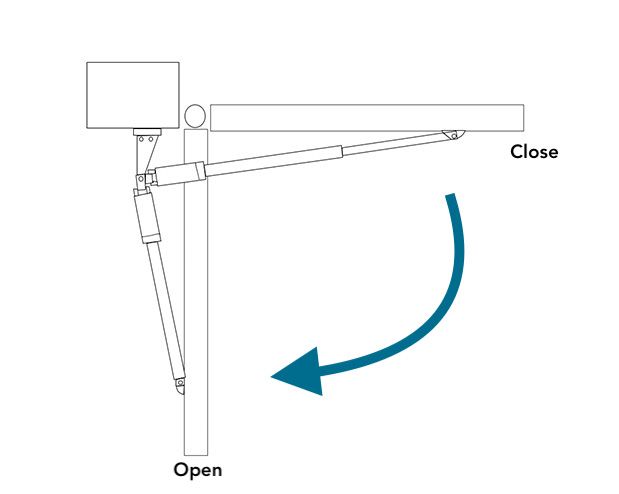
Push to open setup
Gate in the open position
Arm shown running too parallel with the gate
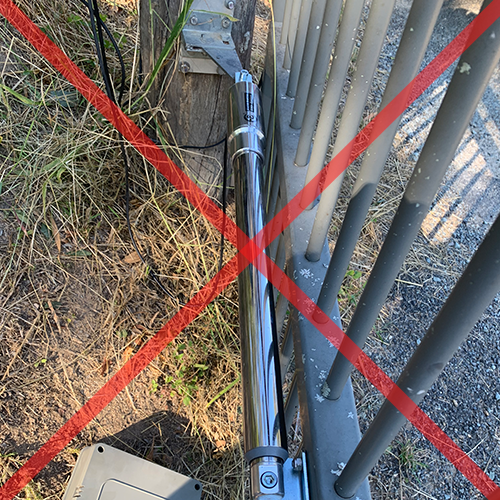
Pull to open setup
Gate in the open position
Arm shown running too parallel with the gate
Push to open setup
Gate in the open position
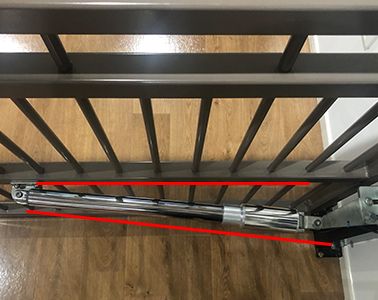
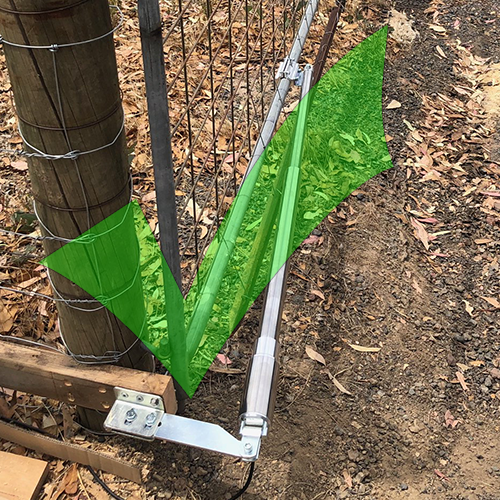
Arm shown here with the correct angle

Push to open setup
Gate in the open position
Arm shown here with the correct angle
Pull to open setup
Gate in the closed position
Arm shown here with the correct angle
Pull to open setup
This setup is for gates pulling into the property with an opening of 90deg. If your gate post is round, then this setup will also work, however, please check out our optional round post brackets incase you require them for the install. You will need to supply the bolts to attach the Primary bracket to the post and its highly recommended that you bolt all the way through your post for added strength.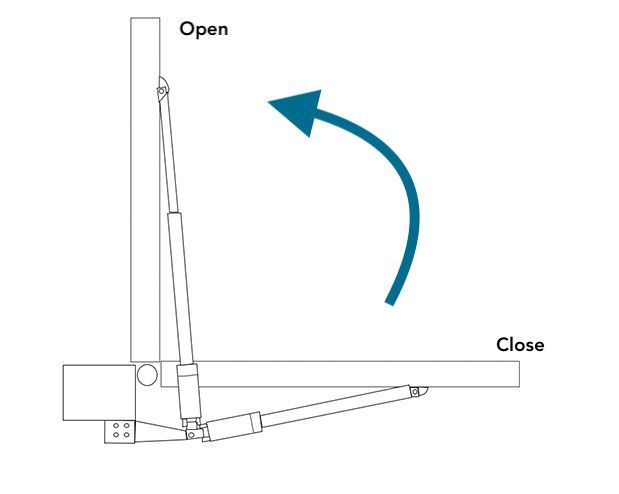
Push to open setup - A
This setup involves having the actuator on the inside of the property pushing the gate outwards to open. Post bracket mounted to the rear of the post. This will be known as option A in the installation manual. For this setup you will be required to purchase the 'Push to Open Bracket'. You will need to supply the bolts to attach the Primary bracket to the post and its highly recommended that you bolt all the way through your post for added strength.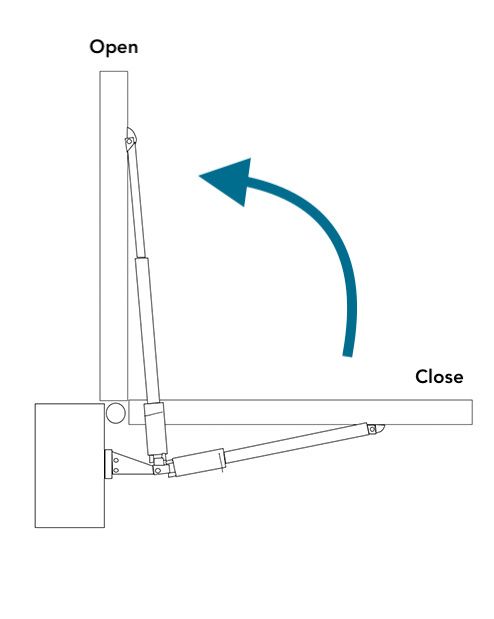
Push to open setup - B
This setup involves having the actuator on the inside of the property pushing the gate outwards to open. Post bracket mounted to the inside face of the post or on the same face that the gate is hinged from. This will be known as option B in the installation manual. You will need to supply the bolts to attach the Primary bracket to the post and its highly recommended that you bolt all the way through your post for added strength.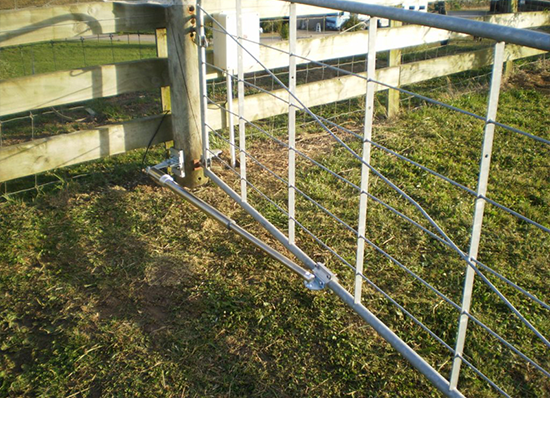
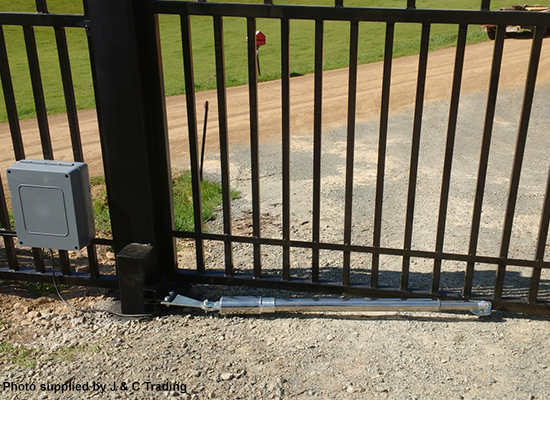
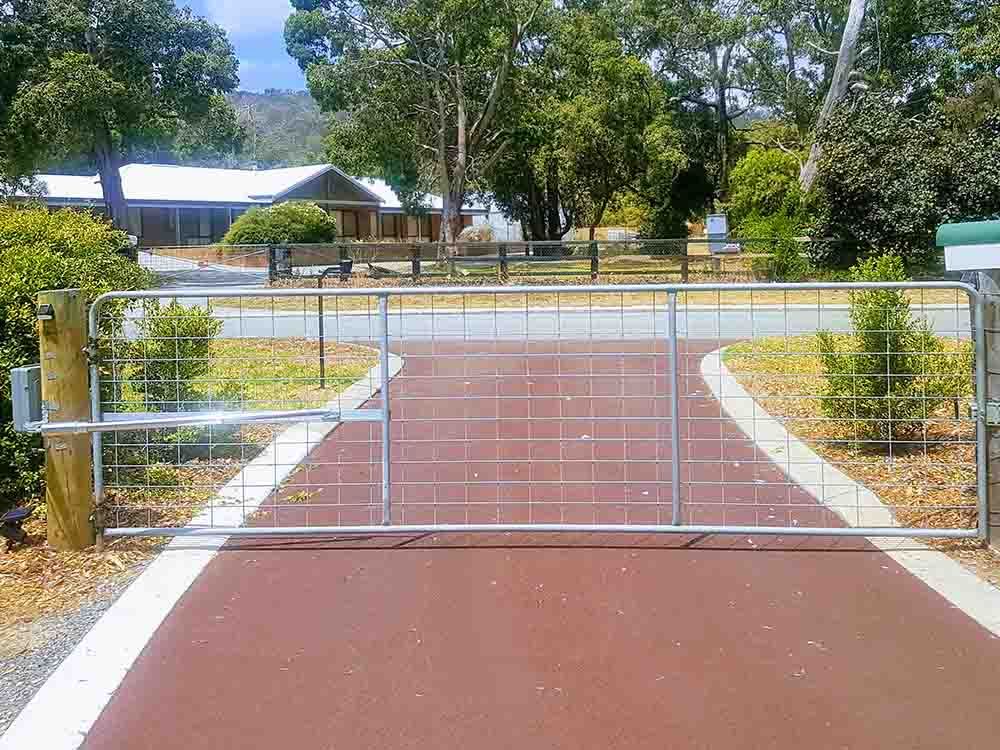

Automatic Gate Opener
The E8 automatic gate opener is a great product when wanting to automate your driveway gate and providing an additional layer of safety and security for family and pets. This gate gate opener is very versatile and will suit gates swinging inward or outward of the property.
Our automatic gate opener is easy to install and comes with full instructions and phone support if required. Adding this gate opener to your property will allow ease of opening and closing of your driveway gate but with the extra security and peace of mind.
Knowing the dimensions and the approximate weight of the gate, the sturdiness of the post and the material the gate is made out of, is necessary in order to choose the correct automatic gate opener for your requirement.
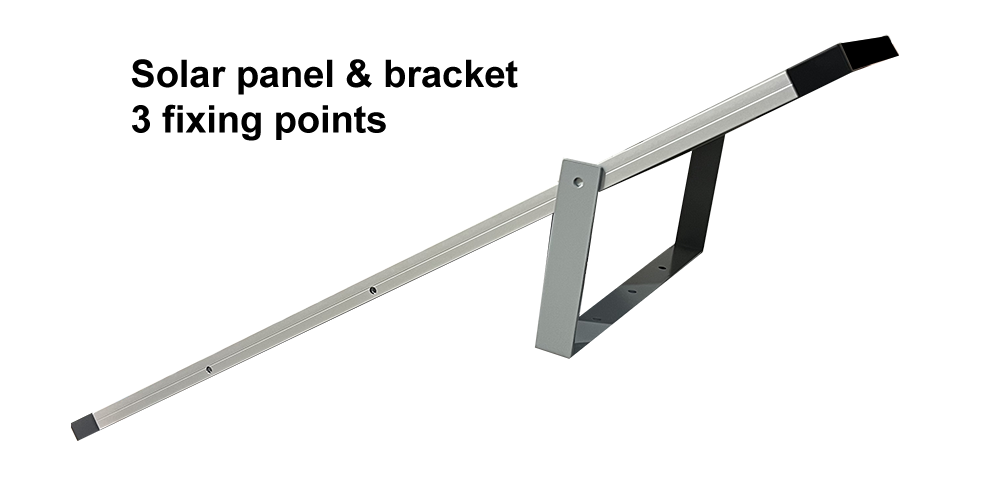
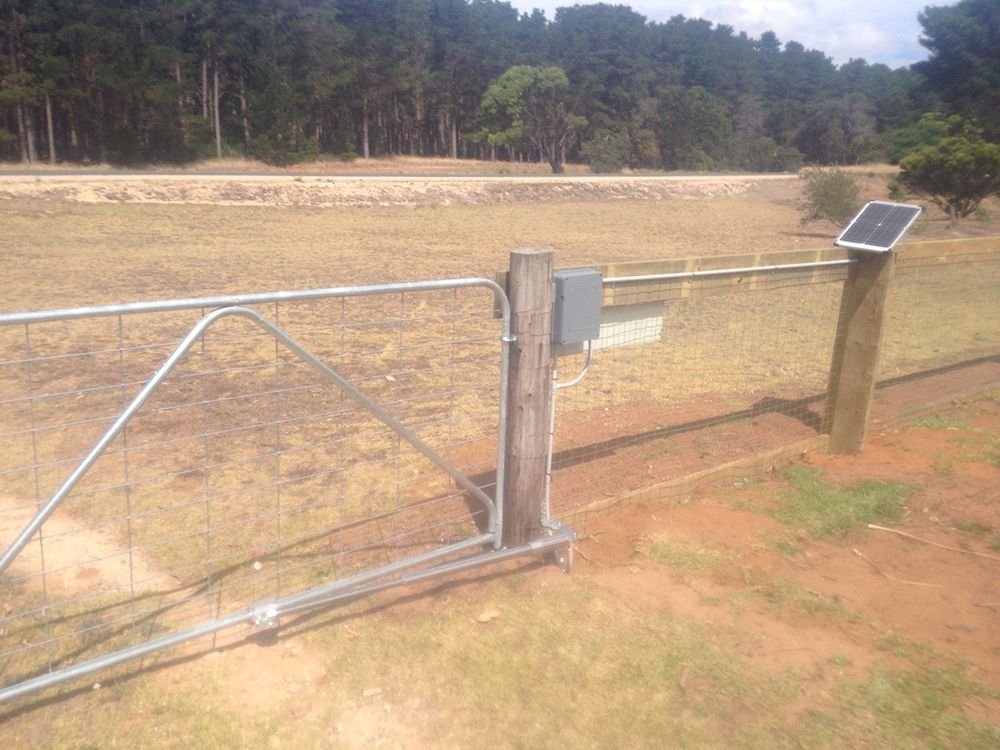
Solar Gate and Electric Gate Kits
Both solar and low voltage electric gate options are available in these kits. The solar kit is the perfect solution if you don't have 240v power around your driveway gate way area but still want the luxury and security of having an automatic gate opener on your front gate.
Now if its electric you're looking for, then there is no need for mains (240V) power at the gate site as the electric kit includes a 16V power supply and can be placed up to 50mtrs away from the gate. This power supply plugs into your 240v outlet which you then run low voltage cable from and directly into the gate opener control box.
Running low Voltage wire is safe and can be even stapled along the fence line or run through conduit 100mm under the ground. Unlike 600mm under ground for 240V supply to your front gate.