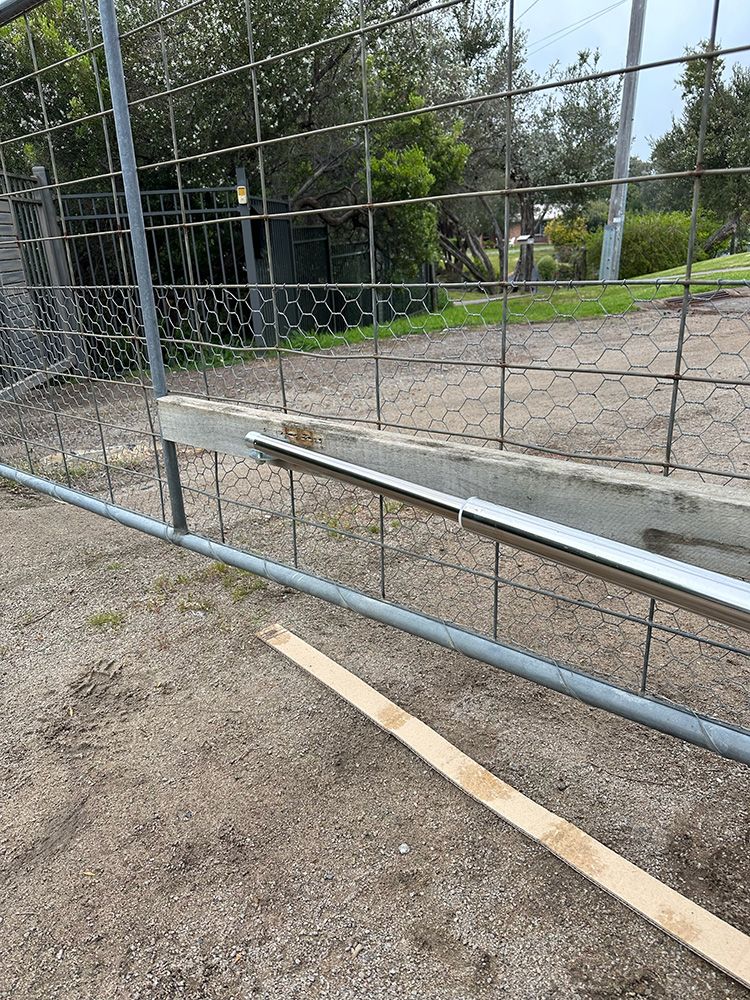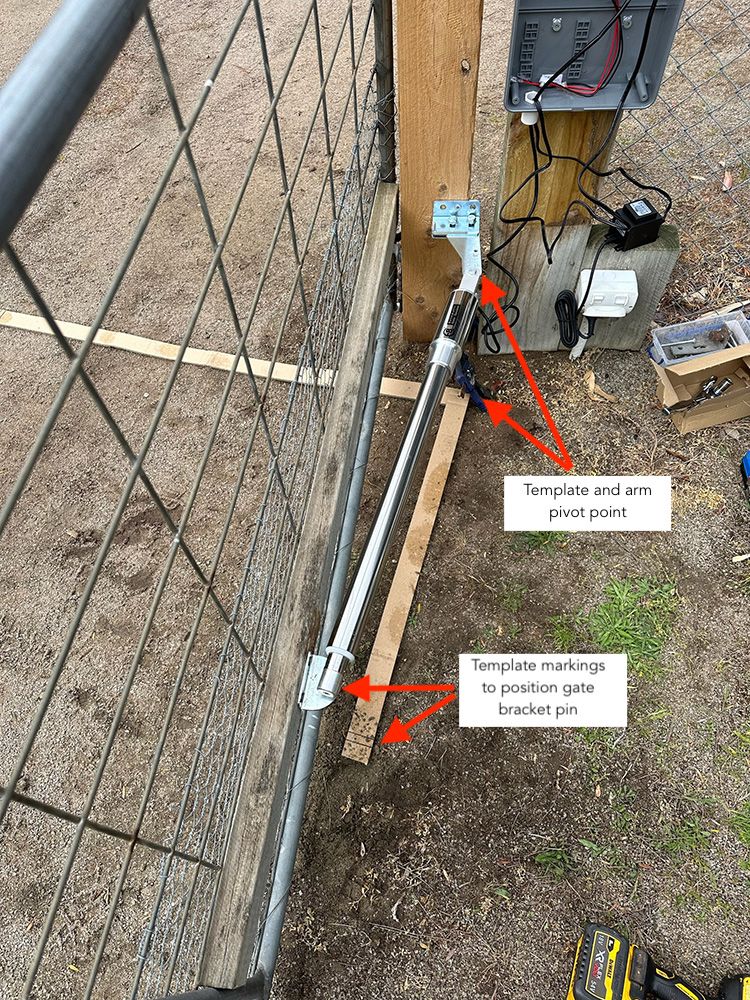
This first image shows us with the gate in the open position and template setup. You will always set your gate up in the open position, generally around the 90 degree mark. This will allow the arm to have full retraction in the open and therefore no ground stop required. You will position your template so that it's pivot point marries up to the secondary bracket and arm pivot point. Using the short side of the template position it to the gate frame and mark the gate with a piece of tape beween the 2 end lines on the template. This will represent the gate bracket pin.
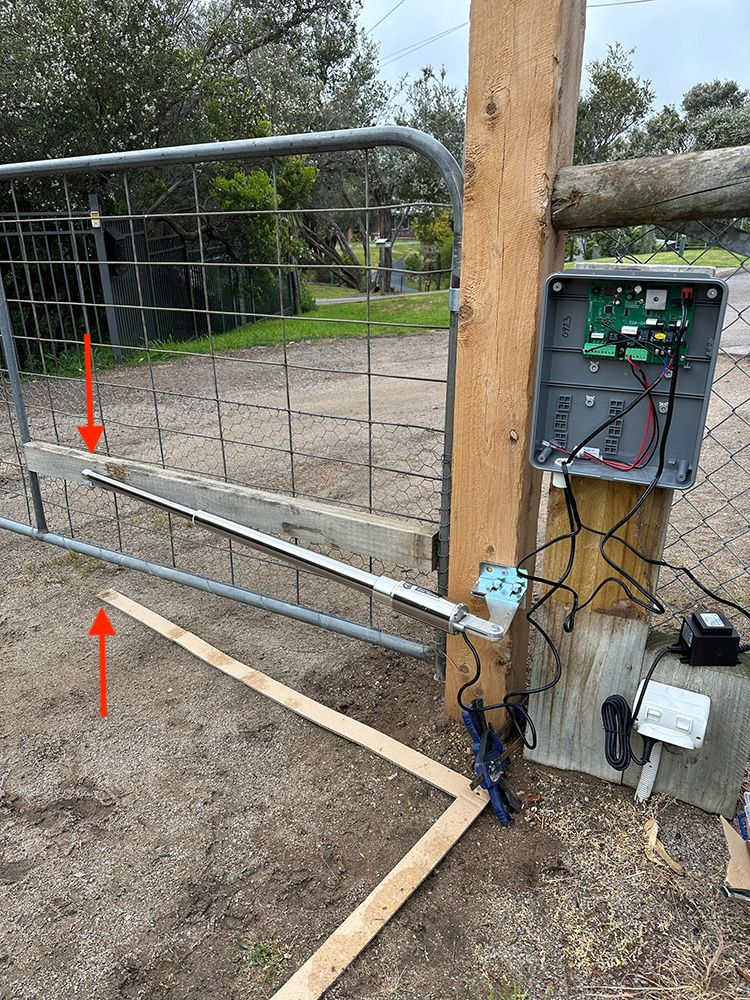
Once you have your mark on the gate from the open position using the short side of the template, you will then close the gate to hit its stop. Bring the long side of the template around to the closed gate frame. Now check that the tape marked on the gate falls within the long cardboard template. If it does, then you have the gate bracket marked and positioned on your gate as well as having the correct position for your actuator arm's pivot point. If the tape falls outside the long cardboard template then your pivot point is not correct which will result in the gate not fully closing. Try adjusting the pivot point and start again.
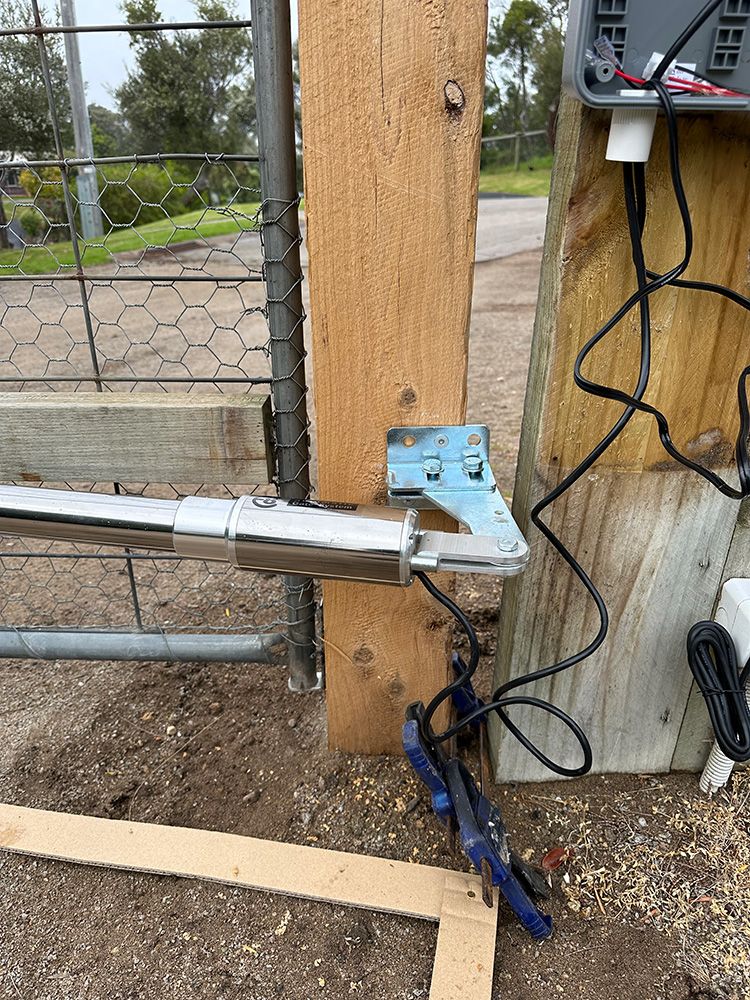
Image above shows a nice angle between the gate and actuator arm. If this is not set correctly and the arm runs parallel with the gate you will end up with a tired and eventually damaged arm.