
QLD MORETON BAY SHOW DAY CLOSURE - WE WILL BE CLOSED MONDAY 11TH AUGUST 2025

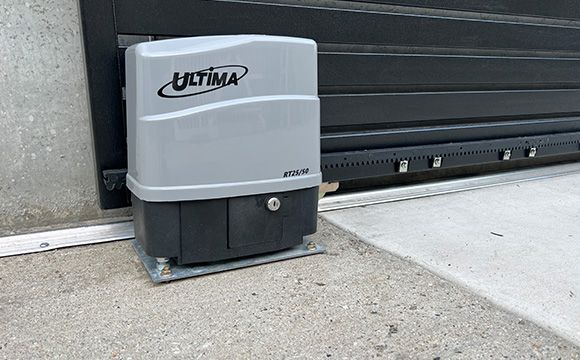
Installing and setting up for the Ultima DACE Motor
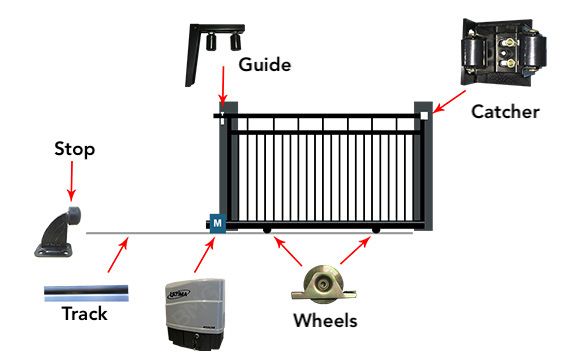
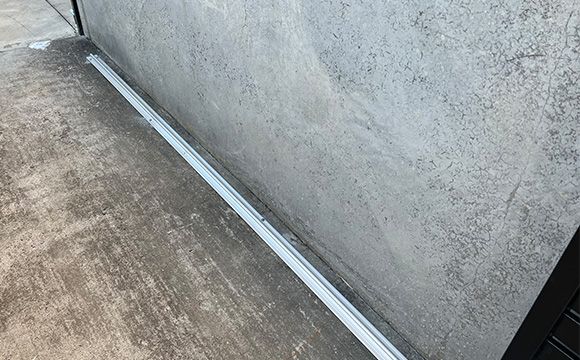
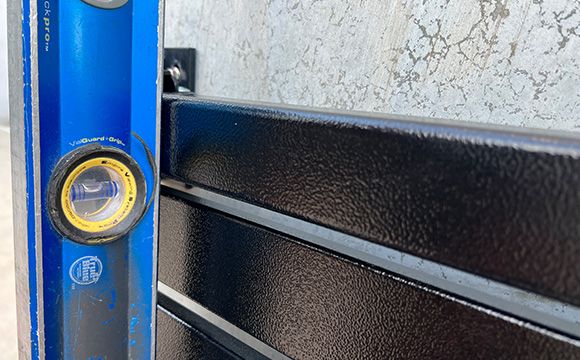
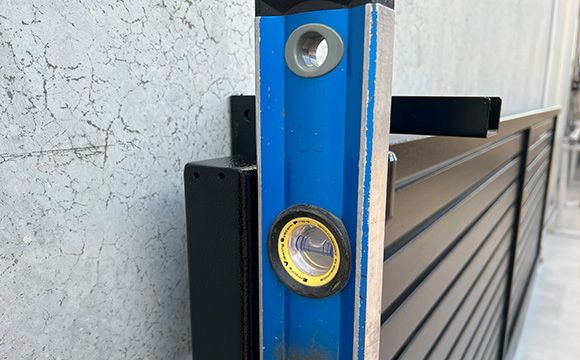
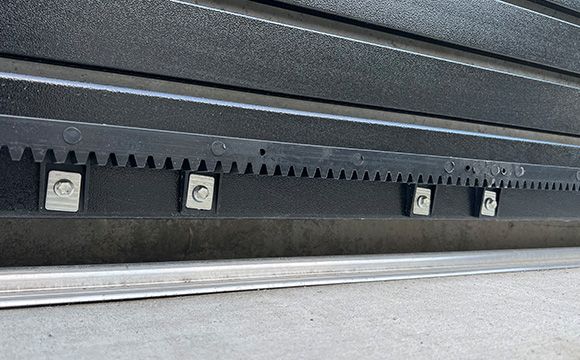
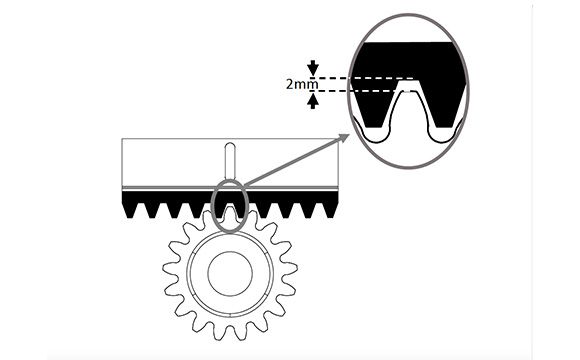
Our first step before installing the motor is to ensure that your gate is setup correctly for manual operation.
DACE Ultima guide setup for installing the motor
aluminium gate track

Sliding gate track

Ensure your aluminium or steel track is well bolted down to the concrete with no movement.
gate wheels

Gate wheels

Ensure your wheels are in good condition and that you can manually push your gate without any change in your push force.

It's not advised to use 3 wheels
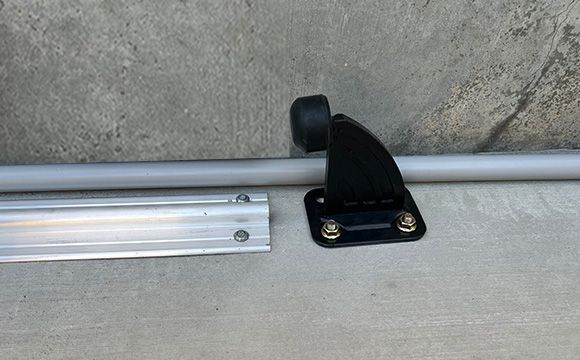
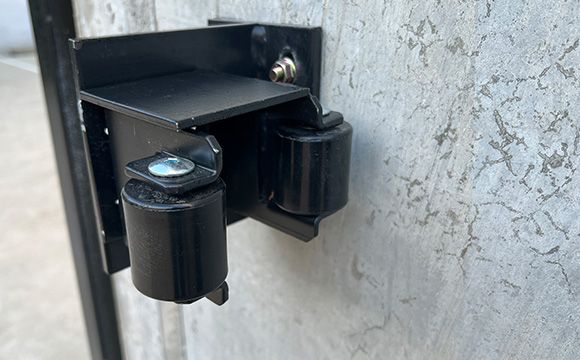
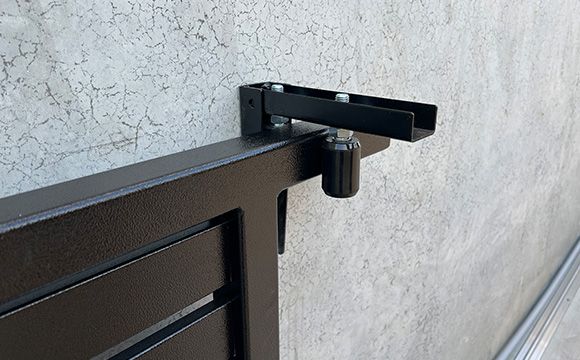
gate stop

Gate stop

A gate stop is required for the open position. This will prevent the gate from running off the track if the gate fails to stop.

The motor will learn from this stop.
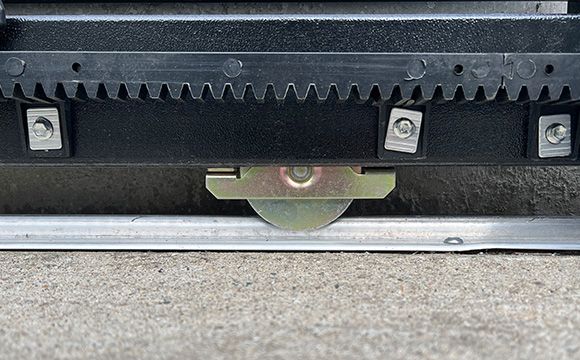
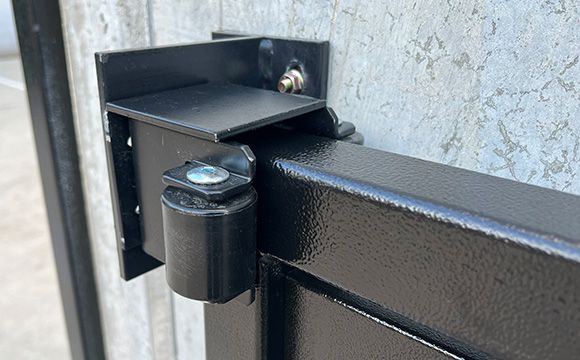
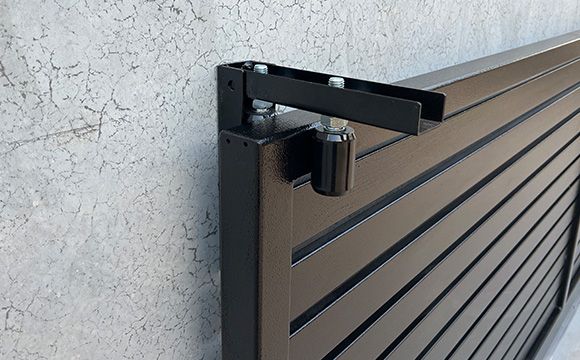
gate stop
gate catcher

Gate catcher

The gate catcher is required for the closed position of the gate. This will help prevent anyone from trying to lift your gate off the track as well as a fail safe for stopping.

The motor will learn from this stop catcher.

gate catcher
gate guide brakect and rollers

Gate guide

2 options of guiding your gate as it moves and keeping it upright. Firstly the guide and roller setup (as shown in photos) and secondly the slide guide and block setup.
gate guide
gate level

Gate check

Last thing to check is that your gate is plumb in the open and closed positions.
gate level

Accessing the motor and removing the lid

Open the 'manual release door' and pull the release pin towards you until the lid is free. The lid can now be removed.
Unlocking the DACE ultima to remove the lid

Placing the motor into manual override

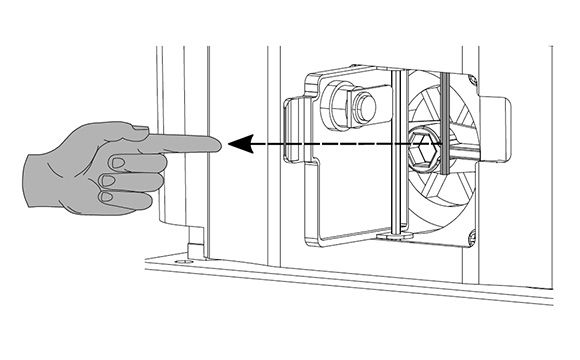
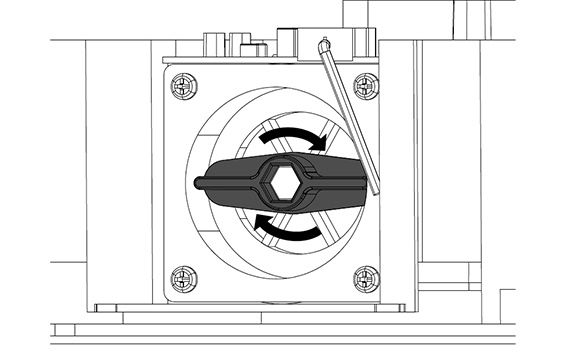
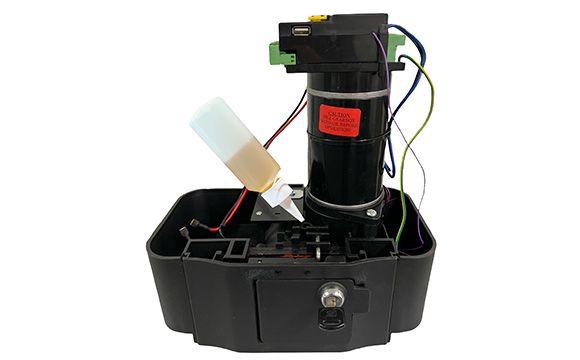
To check if the motor is already set to manual mode, try turning the cog clockwise. If the cog turns then you know it's already in manual mode and if it doesn't turn then follow the instructions below.

Open the 'manual release door' and rotate the thumbwheel clockwise up to 5 full revolutions which should release the cog and place the motor into manual mode. The thumbwheel should not be allowed to rotate too far.

To re-engage the motor when you have it setup on the gate, rotate the thumbwheel counter clockwise while pushing on the gate until you hear a click in the gearbox.

DACE ultima Placing the motor into manual override

Anchoring the foundation plate

With your concrete slab layed and the correct positioning sorted for your conduit - place the foundation plate on the concrete slab and feed the conduit through the cable inlets. Ensure a 35mm clearance between the inner edge of the foundtion plate and the edge of the gate. This measurement is based on BMG racking.
Installing the base place on the DACE Ultima
To calculate the clearance required between the edge of the foundation plate and the edge of the gate (A), measure the width of the rack (B) and minus 5. eg. If the width of the rack is 40mm, less 5 = 35mm. Thus the clearance required is 35mm.
Installing the base place on the DACE Ultima
Attach the foundation plate to the slab using 4 x 8mm anchors.
Installing the base plate on the DACE Ultima

Secure the motor to the foundation plate

Secure the mounting nuts to the base plate as shown, allowing a 5mm gap for fine height adjustment at a later time.
Place a washer on top of each nut.
Installing the base plate on the DACE Ultima
Mount the motor onto the foundation plate.
Mount the motor onto the foundation plate DACE Ultima
Check with a spirit level.
Mount the motor onto the foundation plate DACE Ultima
1. Place a washer onto each bolt.
Mount the motor onto the foundation plate DACE Ultima
2. Then place a nut onto each washer
Mount the motor onto the foundation plate DACE Ultima
Manually move the gate fully open and closed very slowly to ensure that the gate does not collide with the motor in any way.

Mounting the rack on the gate

1. Rest the rack on the pinion with the end of the gate aligned. Have the gate in the full open position, clamp one end of the rack to the gate and screw the other end on.
Mount the gate rack to on the gate
2. Fasten the rack to the gate with the self drilling TEK screws through the slots in the rack. To attach additional rack, slide the gate closed and repeat the procedure.
Mount the gate rack to on the gate
There must be a 2mm clearance between the mounted rack and the pinion.
Mount the gate rack to on the gate
After the rack has been attached, use the height adjustment nuts on the foundation plate to get your 2mm gap.
Mount the gate rack to on the gate

Placing oil in the gearbox - VERY IMPORTANT

The gearbox has been supplied with no oil. You will need to fill the gearbox with the oil provided before commissioning the motor. Failing to do this may damage the motor and void your warranty.

Only us SAE75W-90 oil to refill

Fill the gearbox with the oil provided as shown. The entire (70ml) must be emptied into the gearbox.

Placing oil in the DACE Ultima motor

Mounting the marker magnet - EXTREMELY IMPORTANT

Mounting the marker magnet on the racking

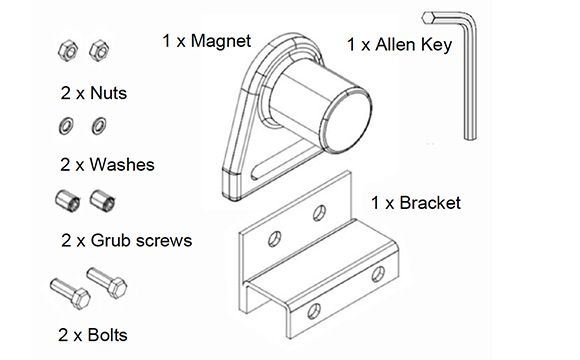
Asselmbling the magnet


Step 1. Install the grub screws with the allen key
Step 2. Install the 2 bolts
Step 3. Attach the magnet to the bolts
Step 4. Attach the washers
Step 5. Attach the nuts and tighten
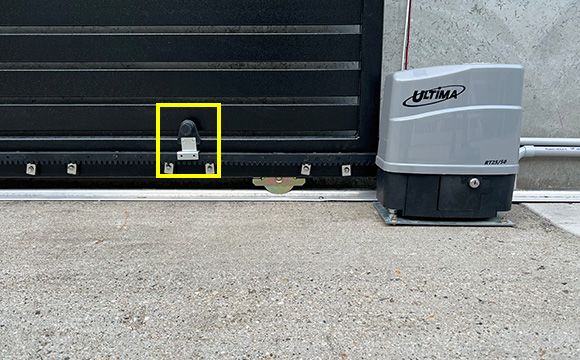
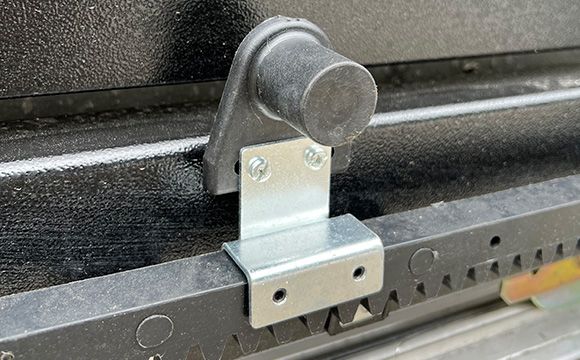
Mounting the marker magnet on the racking

Mounting the magnet


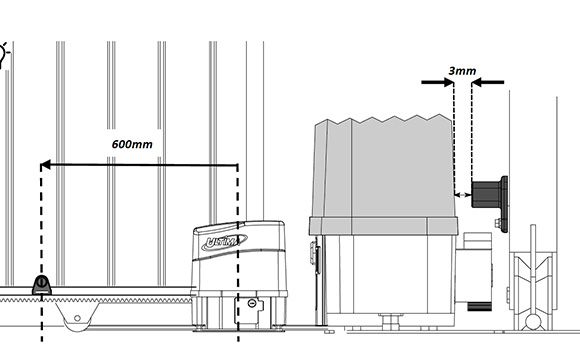
Step 1. Push the gate to the fully closed position.
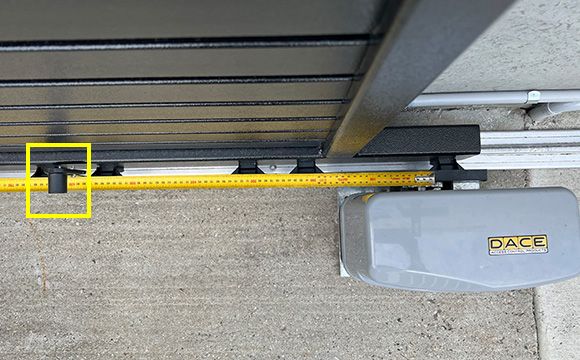
Step 2. Place the magnet on the rack, 600mm from the centre of the motor.
Step 3. Secure the magnet bracket to the gear rack and tighten grub screws.
Step 4. The space between the lid and the magnet must not exceed 3mm. If it does, place washers behind the magnet to reduce the space.

Do not invert the magnet. Only use the magnet supplied with the operator.

Mounting the marker magnet on the racking

Wiring up and commissioning your motor

Once your gate and motor are setup correctly, you can then move onto wiring up your power option which will be either transformer or solar and connecting your 12v battery. You will find these details on page 18 of your user manual. We recommend commissioning your motor first before adding any other accessories and operating the gate a few times to make sure your setup is correct and the motor is operating as it should.

Check out the commissioning video below for extra help.