
TMT 400LLS - Troubleshooting

TMT 400LLS Troubleshooting

  • Solar gate doesn't work in the morning but works later in the day

    Generally if your battery isn't working first thing in the morning but works later in the day when the sun is on your solar panel then you will most likely require new batteries

    • Try charging your batteries
    • If your batteries are 3 years or older replace them
    • If you have a multimeter, test the batteries under load while trying to operate the gate
    • Under loack check your solar regulator battery lights to see if they are mostly solid. If they drop to one or it starts flickering then replace or charge your batteries depending on their age
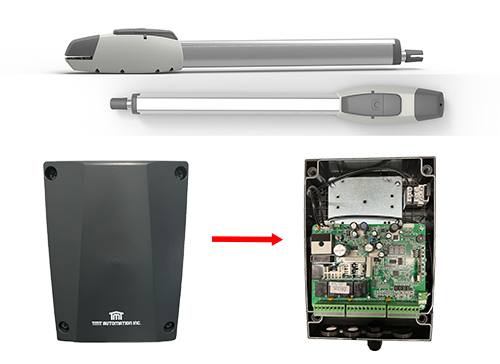
  • I have an electric kit and it has stopped working

    • Check your power point where the transformer is plugged in
    • Check your transformer with a multimeter at the control board and you should be getting minimum 24volts AC
    • Check your fuse
    • If you have backup batteries you can try charging them with a battery charger to see if the unit runs on battery only
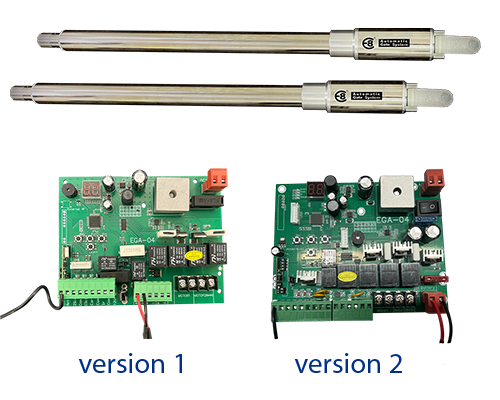
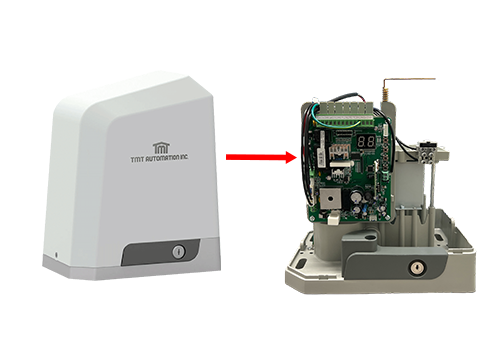
  • How do I check if my actuator arm is working

    You can take the thick white and yellow cable from the actuator arm and run them direct to the batteries. Placing them one way on the batteries will extended the arm and reversing the cables on the batteries will retract the arm.
  • My visitor push button has stopped working (remotes still work)

    We have hard wired and wireless push buttons so we will try to cover both here

    Hard Wired Button

    • Check for insect infestation in your push button housing
    • Check cabling by removing the cable from the push button and tapping them together - this should activate the gate. Re wire to the push button and see if it works.
    • Try contact spary or WD40 on the internal connectors and see if this helps
    • If the above help doesn't reslove the issue you will need a new push button.

    Wireless Button

    • Check for insect infestation in your push button housing
    • Replace internal battery
    • Check wiring and connection from small internal pcb is good
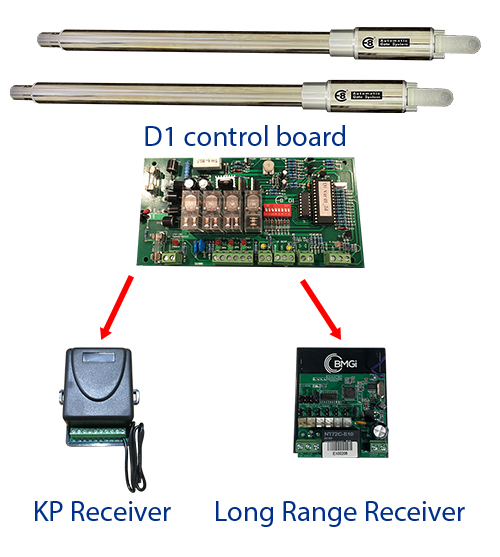
    • Your push button will be tuned to a separate receiver which you will need to check
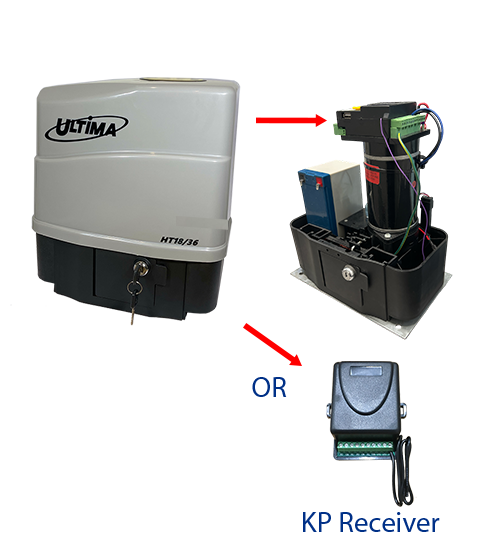
    • Locate the KP receiver inside the main control box and check that there are not ants inside the receiver box
    • Easiest way to check if your KP receiver is working is by tuning in a spare button on your TMT remote - view our support page for help with tuning remote to KP Receiver
    • If you tune your remote and the receiver works, try tuning your push button back in, just in case it has dropped out - you'll find tuning instructions on our support page
    • If you tune your remote and the receiver still doesn't work, continue with the following troubleshooting
    • Check the KP receiver is getting power. Best way is with a multimeter and making sure you are getting correct voltage to the receiver which should be a little higher than 12volts DC
    • When you press the visitor button you should hear a click sound from the receiver saying it is receiving the signal
    • If the receiver has correct power you can test the NO and COM cables from the receiver by tapping them together which should activate the gate - if the gate activates then you cabling is good
    • Please contact the office and speak with our technician if the above troubleshooting doesn't help
  • My remote has stopped working

    • Try replacing the battery
    • If you replace the battery and it still doesn't work, try re tuning the remote to the device to see if the remote has dropped out
    • If neither of the above solutions work you will need a new remote

Read more: TMT 400LLS - Troubleshooting

  • Hits: 1392

e-Loop Vehicle Motion Loop Detector Sensor

Wireless Vehicle Exit Sensor for Gate Automation – eLoop

The smarter way to detect vehicles exiting your driveway.

Upgrade Your Driveway with the eLoop Wireless Exit Sensor

The eLoop Vehicle Motion Sensor is an innovative, wireless detection system designed to automate the exit process for residential gates and driveways. Unlike traditional wired loops that require trenching or core drilling, the eLoop sits above the surface—offering a hassle-free installation and zero ground damage.

Whether you're automating a gate at a home, rural property, or small business, the eLoop offers accurate detection, reliability in all conditions, and fast response times.

What is the difference between exit mode and presence mode?

'Exit mode' will trigger the gate to open and whether the vehicle has moved or remains stationary, the gate will close once auto close activates.

'Presence mode' will trigger the gate to open and auto close will not activate until the vehicle has moved away from the e-loop.

eLoop wireless vehicle sensor installed on driveway

How It Works

  • Detects motion from cars, utes, and light trucks
  • Works with most gate automation systems
  • Wireless communication with receiver unit
  • No need to cut concrete or asphalt

Perfect for Residential Use

  • Driveways with automatic swing or sliding gates
  • Homes without underground cabling
  • Acreage properties and rural locations
  • Upgrades from older wired systems

E-loop Mini Wireless Vehicle Detector - Domestic 'Exit Mode'

eLoop Mini wireless vehicle detector and e-TRANS-50 receiver unit for gate automation systems

The e-Loop Mini is a compact, wireless vehicle detection sensor tailored for residential use. Its sleek design allows for discreet installation without compromising your home's appearance. With no need for trenching or complex wiring, it easily connects to most gate controllers using a wireless transmitter. The e-Loop Mini offers a simple, reliable solution for automatic gate activation, giving homeowners convenient and efficient vehicle access.

Key Features

  • Wireless Design – No trenching, no wires, no mess
  • Reliable Vehicle Detection – Consistent performance rain or shine
  • Battery Powered – Up to 5 years battery life
  • Fast Installation – Surface-mounted with minimal tools
  • Tamper-Proof Casing – Durable and weather-resistant
  • Customisable Settings – Adjust sensitivity and detection range
  • Static load capacity – 2500kg
  • Range – 50 metres
The Microtech Designs Domestic Wireless Vehicle Detection System uses advanced magnetometer sensors to detect vehicle presence and movement. Once a vehicle is detected, the sensor communicates wirelessly with a nearby Microtech transceiver to trigger gate operation. Designed for surface mounting with durable dynabolts, each sensor is powered by two replaceable AA batteries and built to withstand the weight of virtually any vehicle.
eLoop wireless vehicle sensor installed on driveway eLoop vehicle sensor detection area diagram showing high, medium, and low detection zones

E-loop Mini Wireless Vehicle Detector - Commercial 'Presence Mode'

eLoop Mini wireless vehicle detector and e-Trans-50 receiver for gate automation systems

The e-Loop Commercial is engineered for tough environments, delivering exceptional durability and dependable performance where continuous operation is essential. Built with a rugged, weather-resistant design and a high-visibility finish for added safety, it ensures accurate vehicle detection in all conditions. Ideal for warehouses, truck yards, and agricultural sites, the e-Loop Commercial helps reduce downtime, boost efficiency, and keep operations running without interruption.

Key Features

  • Wireless Design – No trenching, no wires, no mess
  • Reliable Vehicle Detection – Consistent performance rain or shine
  • Battery Powered – Up to 4 Year battery life (Presence Mode)
  • Fast Installation – Surface-mounted with minimal tools
  • Tamper-Proof Casing – Durable and weather-resistant
  • Customisable Settings – Adjust sensitivity and detection range
  • Made of high-impact plastic – 10-tonne static load capacity
  • Range – 50 metres
Microtech Radar® sensors are built to reliably detect stationary vehicles positioned above the e-Loop using advanced radio communication technology. When a vehicle is detected, the sensor immediately signals the e-Loop system via relay to confirm presence. If a drop in the magnetic field is sensed, the radar quickly scans the area to verify whether a vehicle is still within range. If no vehicle is found, the relay automatically deactivates.
eLoop wireless vehicle sensor installed on driveway eLoop vehicle sensor detection area diagram showing high, medium, and low detection zones

Easy Installation

Install the sensor above ground using included mounting hardware
no need for saw cutting or concrete work. Ideal for retrofit upgrades and new builds alike.

FAQs About the eLoop Exit Sensor

Will the eLoop work with my existing gate motor?
Most likely, yes. The eLoop is designed to be compatible with a wide range of gate control boards.
Is it suitable for all weather conditions?
Yes, the eLoop is fully weather-sealed and built to withstand Australia’s harsh climate.
How long does the battery last?
The internal battery typically lasts up to 5 years under normal usage conditions.

Read more: e-Loop Vehicle Motion Loop Detector Sensor

  • Hits: 2345

Tuning wireless keypad to a device

Tuning BMGi's wireless keypad to the correct device

Need help identifying which device you have to tune your wireless keypad to.
Search our products below to match your system or device and watch the corresponding video.
E8 500kit - latest model - swing gate
If you have an E8 500kit with an EGA control board version 1 or 2 as shown below - watch this video for tuning instructions
E8 500 version tuning wireless keypad
E8 500kit - old model - swing gate
If you have an E8 500kit with a D1 control board as shown below you will have a separate receiver to tune your keypad to.
Check which receiver you have in your kit from the image below and watch the corresponding video for instructions.
The KP receiver will be located in the main control box and the Long Range Receiver may be located either inside the main control box or outside on your post.
You will need to open up your receiver to get to the small main board to do the tuning.
tuning wireless keypad to BMG gate system
How to tune your keypad to the KP Receiver
How to tune your keypad to the LR Receiver with the purple antenna.
Note: if you don't have the black jumper you can use a small screw driver to bridge the 2 pins.
DACE Ultima - slide gate
If you have a DACE Ultima kit as shown below - watch this video for tuning instructions.
You will need to remove the top cover off the motor to get to the main control board.
You will either tune the keypad direct to the main control board, however if you have a KP receiver in your unit from an early DACE model then we recommend tuning your keypad to the KP Receiver.
tuning wireless keypad to BMG DACE gate system
How to tune your keypad to the DACE Ultima
How to tune your keypad to the KP Receiver
TMT 400LLS - swing gate
If you have the TMT 400LLS kit as shown below - watch this video for tuning instructions.
You will find the main control board inside the main control box as shown in photo.
tuning wireless keypad to BMG TMT 400LLS gate system
How to tune your keypad to the TMT 400LLS
TMT 800LS - slide gate
If you have the TMT 800LS kit as shown below - watch this video for tuning instructions.
You will need to remove the top cover off the motor to get to the main control board.
tuning wireless keypad to BMG TMT 800LS gate system
How to tune your keypad to the TMT 800LS

Read more: Tuning wireless keypad to a device

  • Hits: 4813